Easy DIY Clay Desk Organizer
Why is getting organized so hard to exercise? Some people love organizing and keeping everything in its place. However, there are those who thrive in organized chaos. Their space may look like it is in disarray, only they know exactly where everything is.
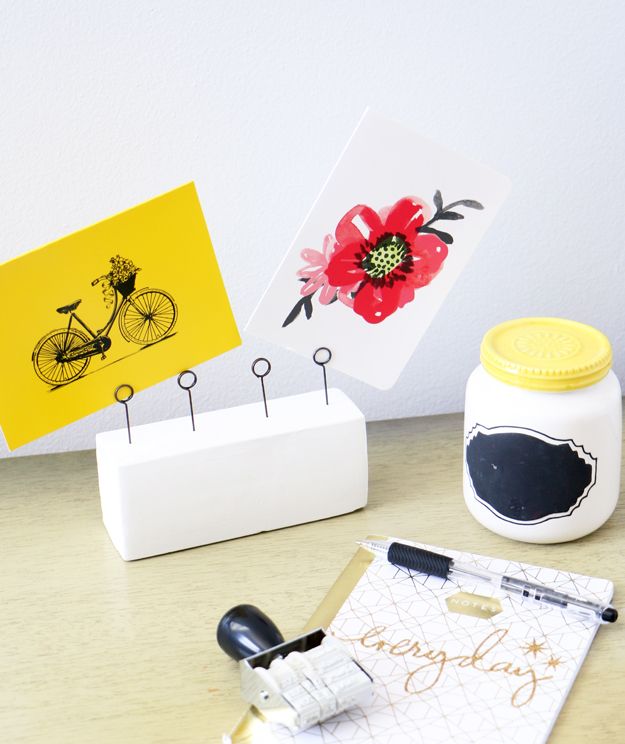
If you are someone who follows the organized chaos rule of pollex, you are going to dearest this DIY. Y'all can chop-chop and easily create a desk organizer to whip your anarchy into shape! This organizer will accept those loose cards, receipts, and post and put them in a place then they won't become cached under other items and wont go missing, especially if they are important!
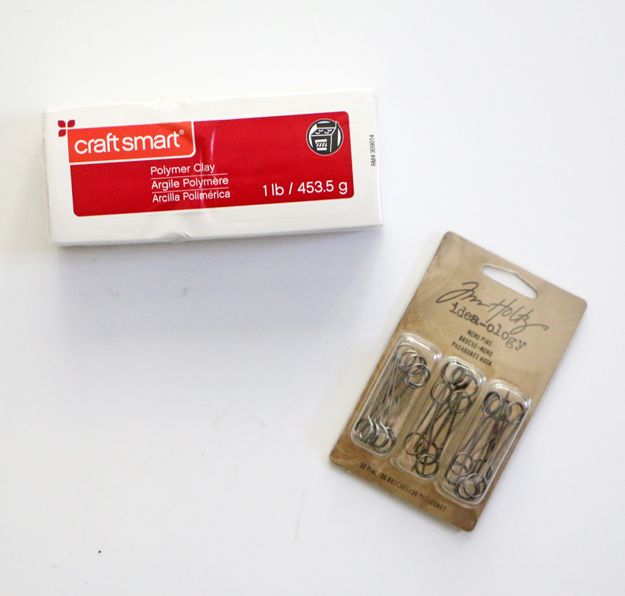
Here'south what yous'll demand:
- 1 Pound of Oven Broiled Clay (I chose white, simply y'all could option whatsoever color you lot want)
- Tim Holtz Ideology Mini Pins
- Oven Safety Dish
- Oven
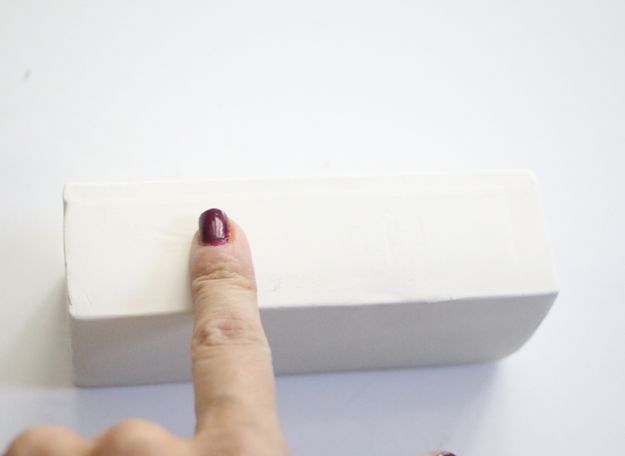
Step one: Unwrap your clay. If your clay is not already in the shape of a brick, you will want to get-go roll out your clay. Next, you will use your hands to mold it into a rectangular shape. You can press your clay against your surface to get straight, smooth sides.
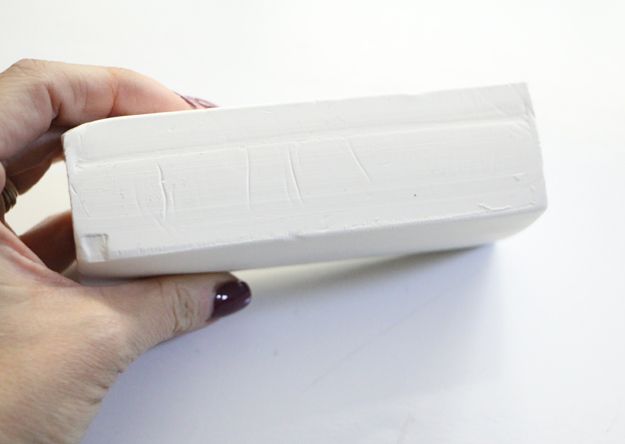
Step 2: If your clay has any imperfections, use the tip of your finger to polish them out. You desire to brand sure you don't press too hard; you don't want to create whatever dents or impressions in your dirt. You desire it to exist nice and shine.
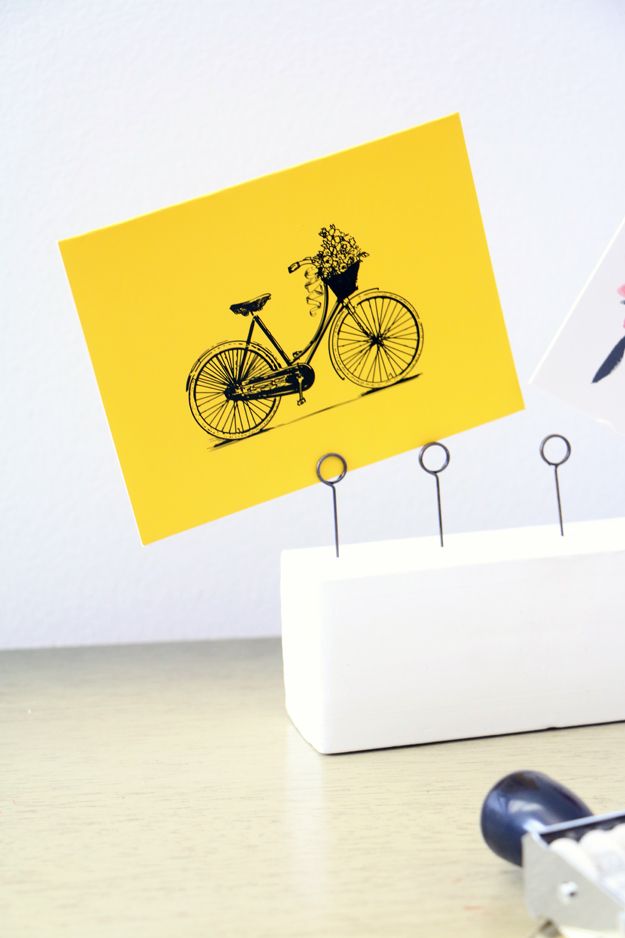
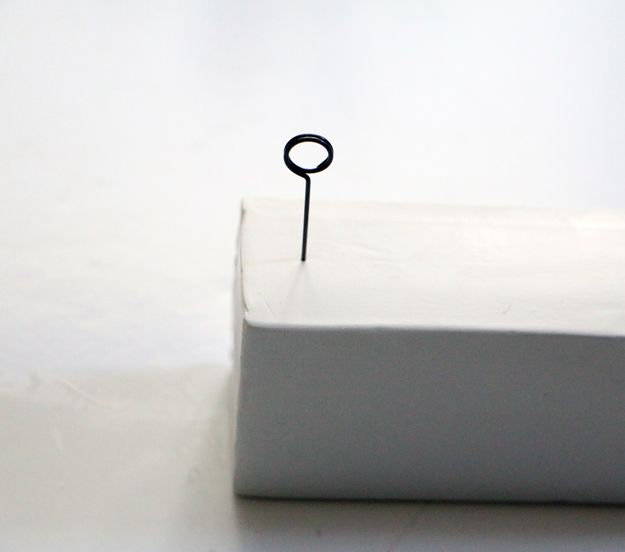
Step 3: In one case your clay in nice and smoothen, take hold of i of your mini pins and place information technology in your clay. I placed my commencement pivot virtually about a 1/4 inch from the end.
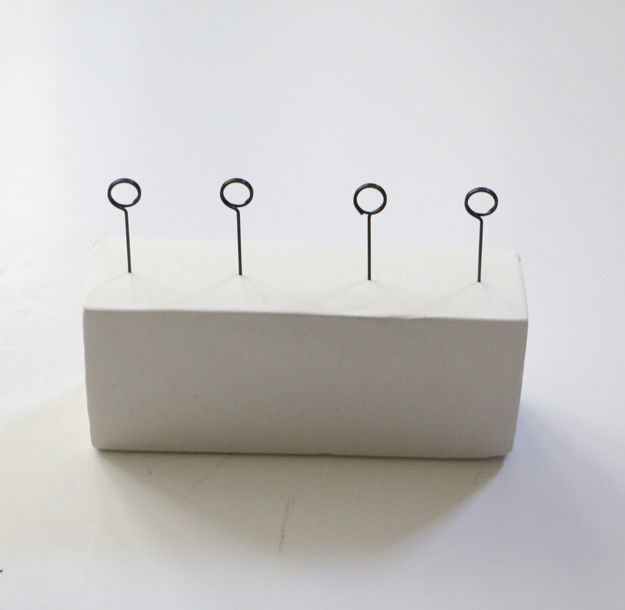
Step four: I and so placed another pivot on the other end of my clay. I made certain it was also nigh a one/4 inch from the finish.

Stride 5: I then filled in the space between my pins with two more pins. I spaced these about one and 1/viii inch from 1 another. Annotation, you could add your pins closer if you lot want. If you add your pins close to one another, you lot will limit the size of the items you can place inside of your clips as they will be very close to ane another.
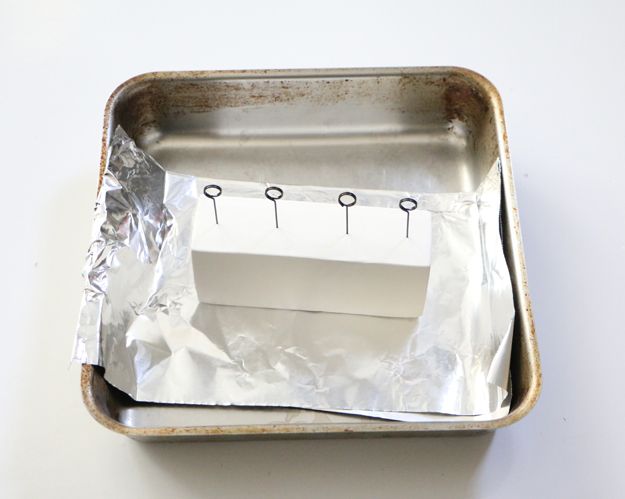
Step 6: Once all of your pins have been place in your clay, it's time to bake. You will desire to catch your over rubber dish for this. I went and lined my tray with foil to protect the surface from my clay. Go alee and place your clay in your oven at the temp recommended on the parcel and cook it according to the recommended cook time.
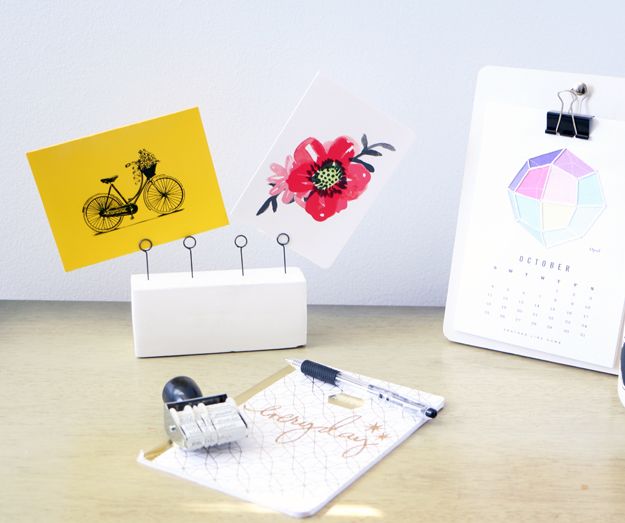
Afterwards your clay has broiled for the recommended fourth dimension, remove it from the oven and allow it to absurd. One time it is absurd, your pins volition be squeamish and secure inside of your dirt! Now, information technology'south time to add those of import cards, receipts, whatever you have on your desk that you lot don't desire to go missing!
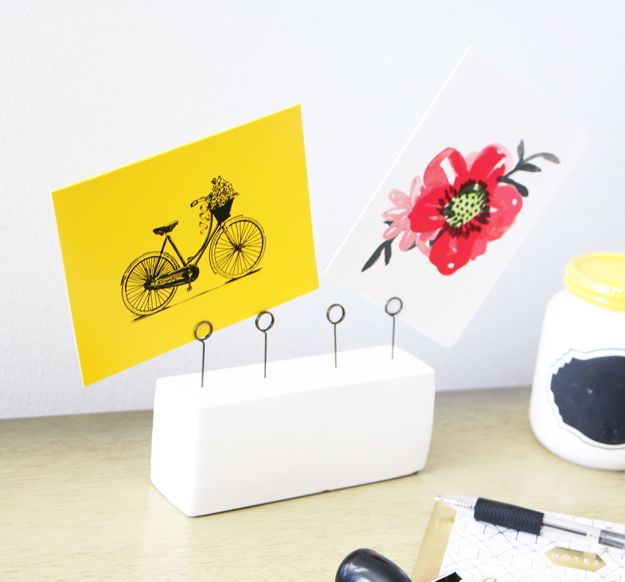
You could also utilize this organizer to display your favorite pictures!

Source: https://www.diys.com/clay-desk-organizer/
0 Response to "Easy DIY Clay Desk Organizer"
Post a Comment